How to Install and Use ComfyUI on Windows - Complete Guide
What is ComfyUI?
While Stable Diffusion WebUI has been the go-to tool for text-to-image generation, requiring configuration of multiple settings across different modules, ComfyUI offers a more intuitive approach. It uses a visual node-based workflow that makes the text-to-image process more efficient and user-friendly.
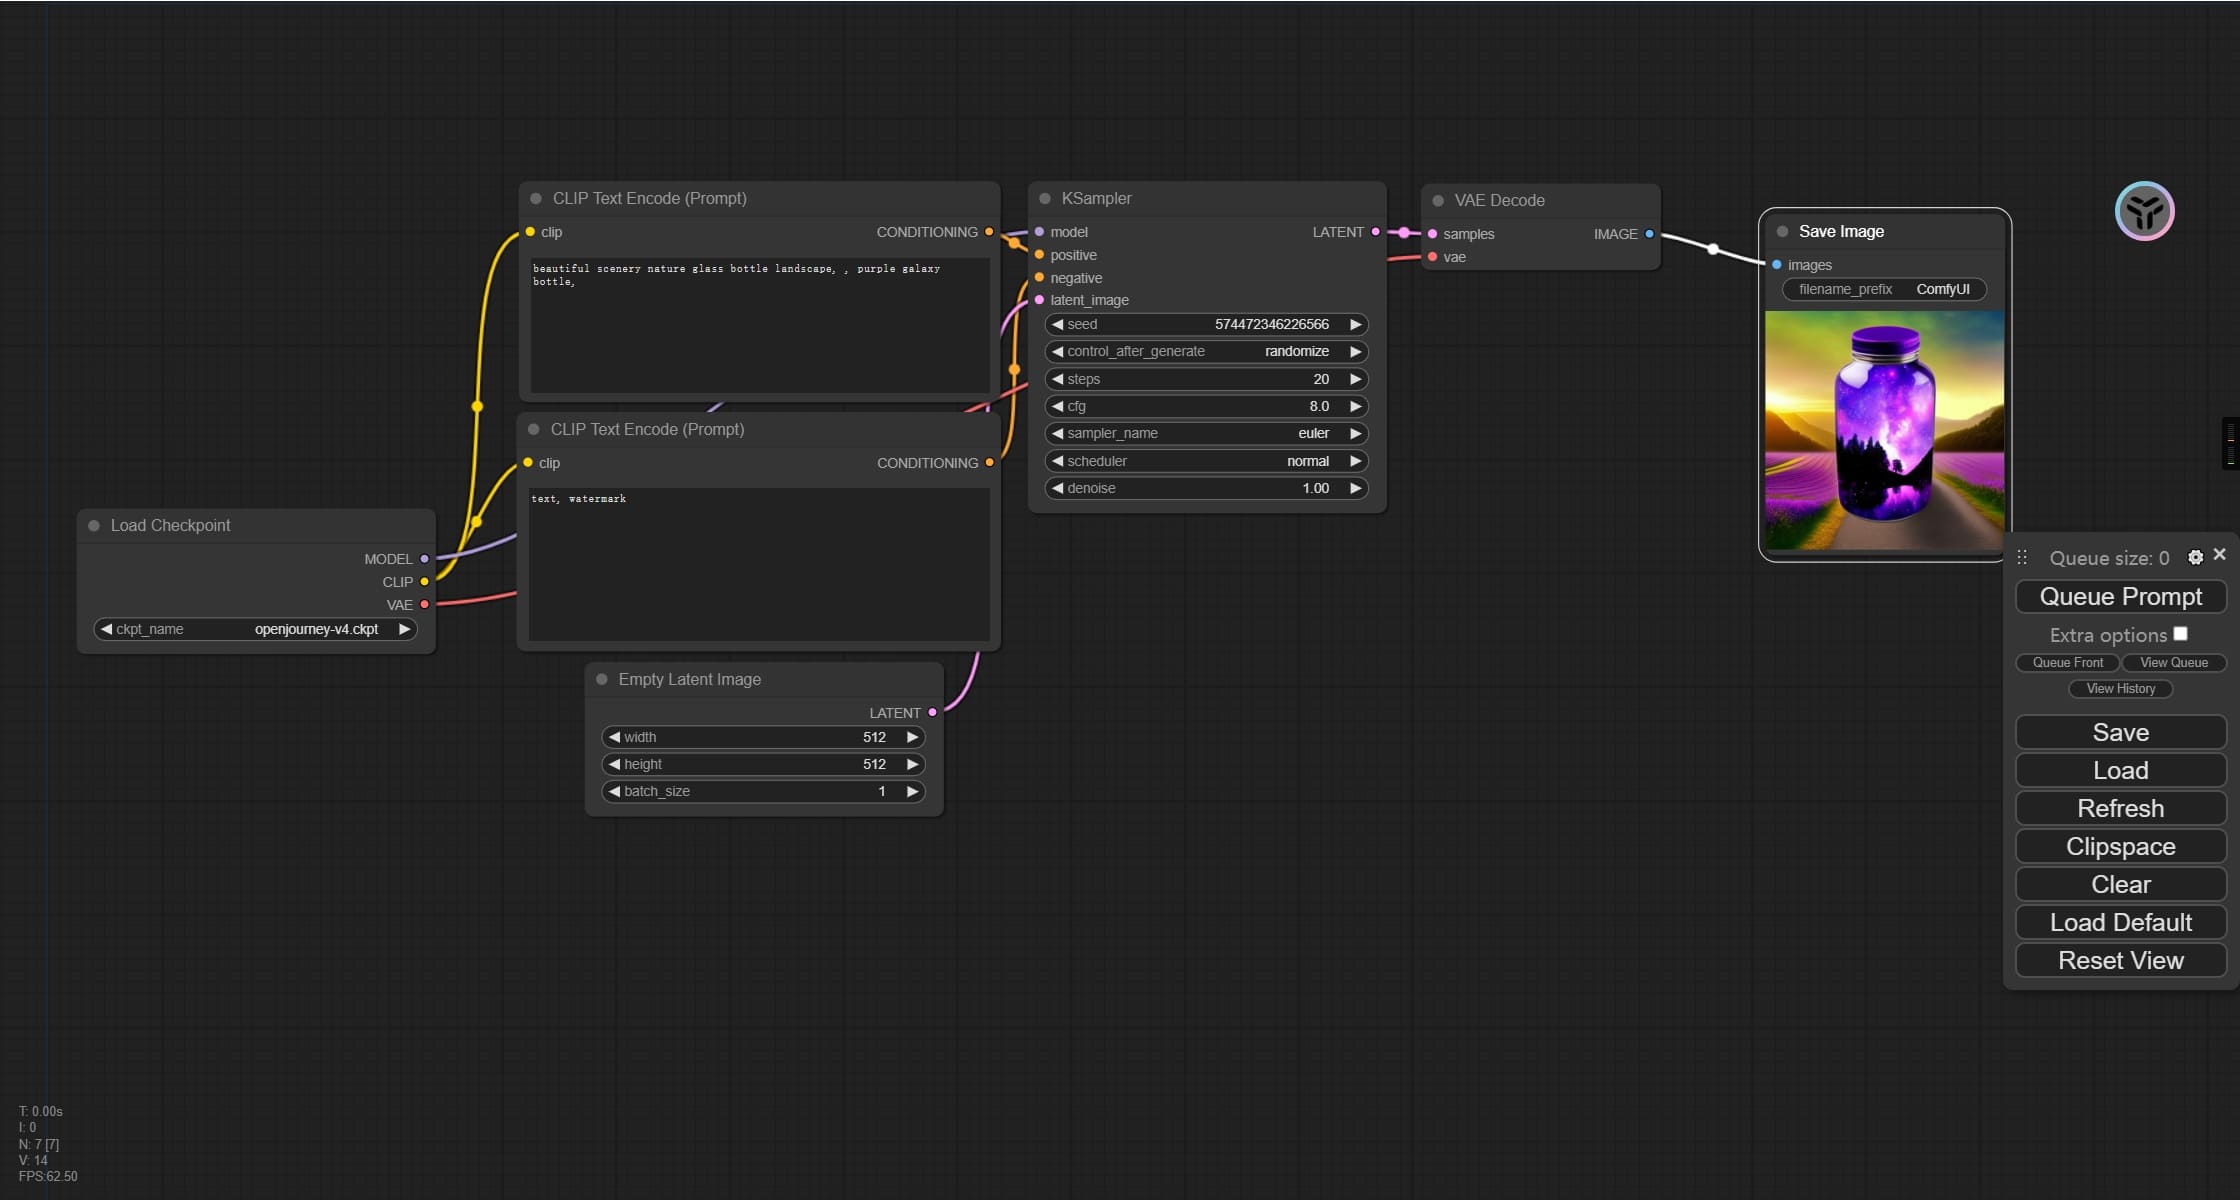
Basic Installation Guide for Windows
Required Downloads
Installation Steps
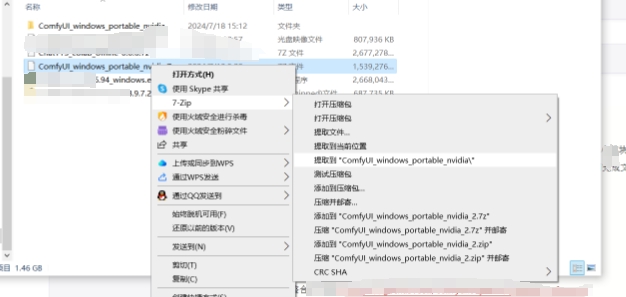
- Download and extract the package using 7-Zip
Pre-launch Configuration
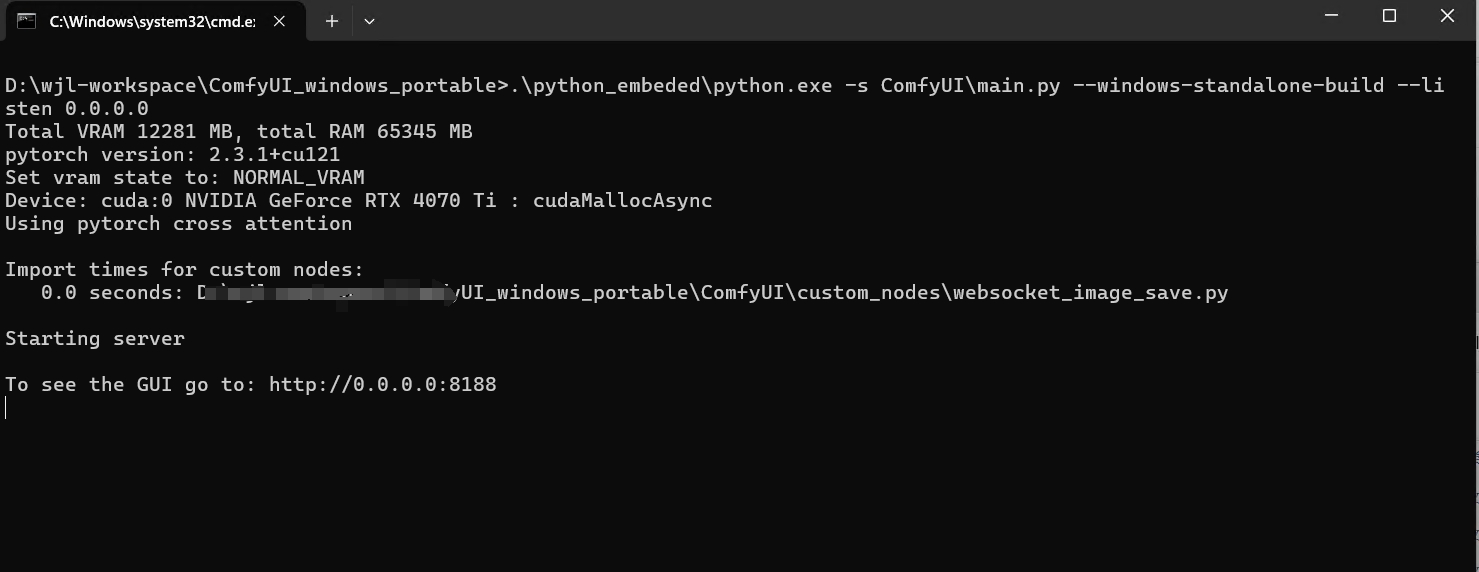
If you need external access after launch, right-click and edit either
run_cpu.bat(for CPU) orrun_nvidia_gpu.bat(for GPU) and add the parameter--listen 0.0.0.0Example of modifiedrun_nvidia_gpu.bat:
       .\python_embeded\python.exe -s ComfyUI\main.py --windows-standalone-build --listen 0.0.0.0
pause
Launching ComfyUI
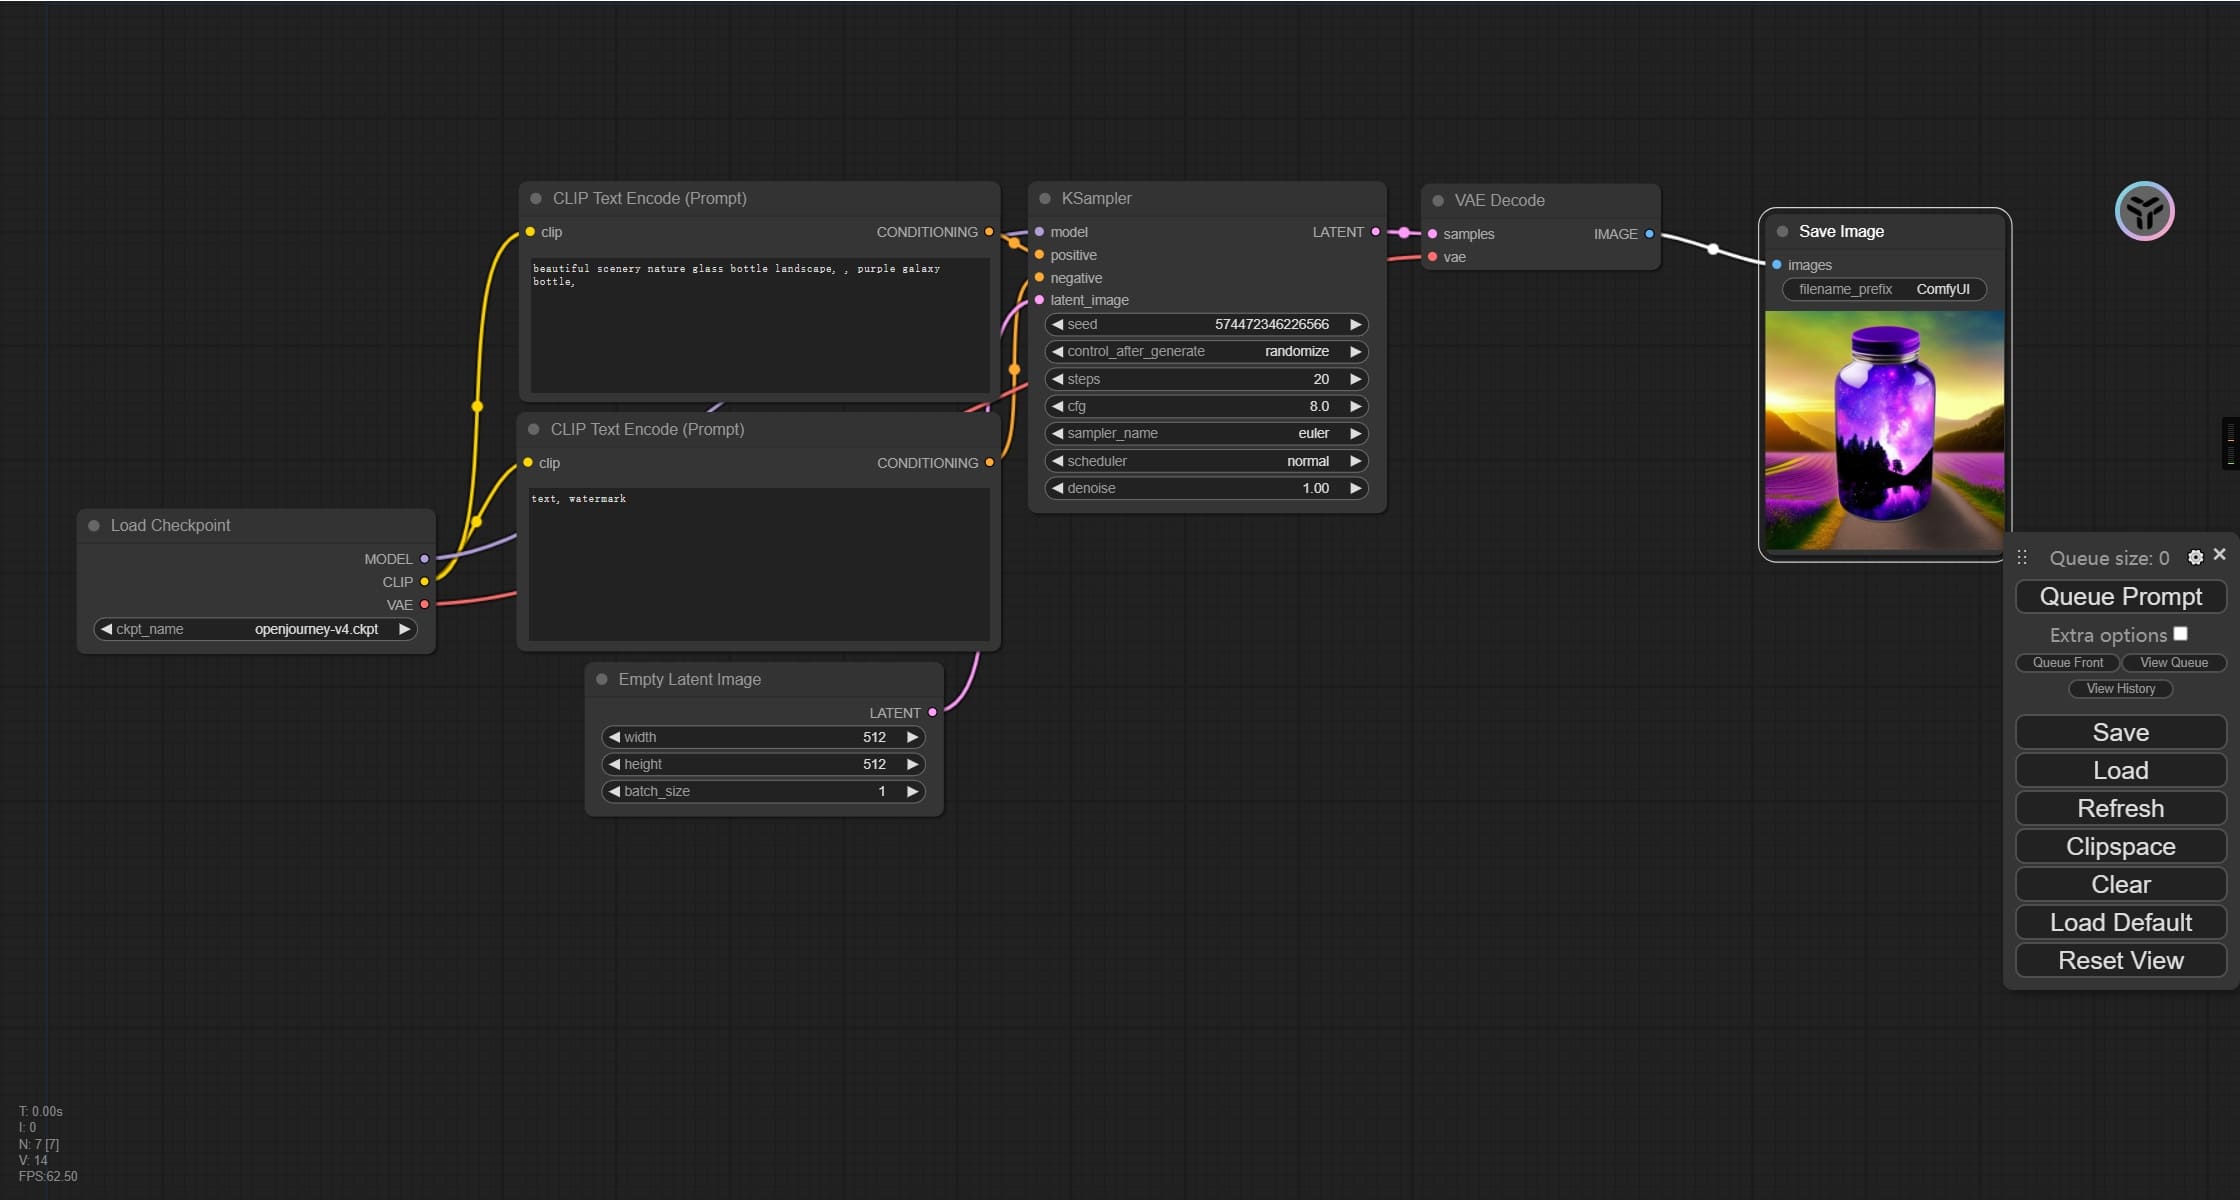
Double-click either run_cpu.bat (CPU) or run_nvidia_gpu.bat (GPU) to start. If successful, your default browser will open to http://127.0.0.1:8188, displaying the ComfyUI interface.
Setting Up Models
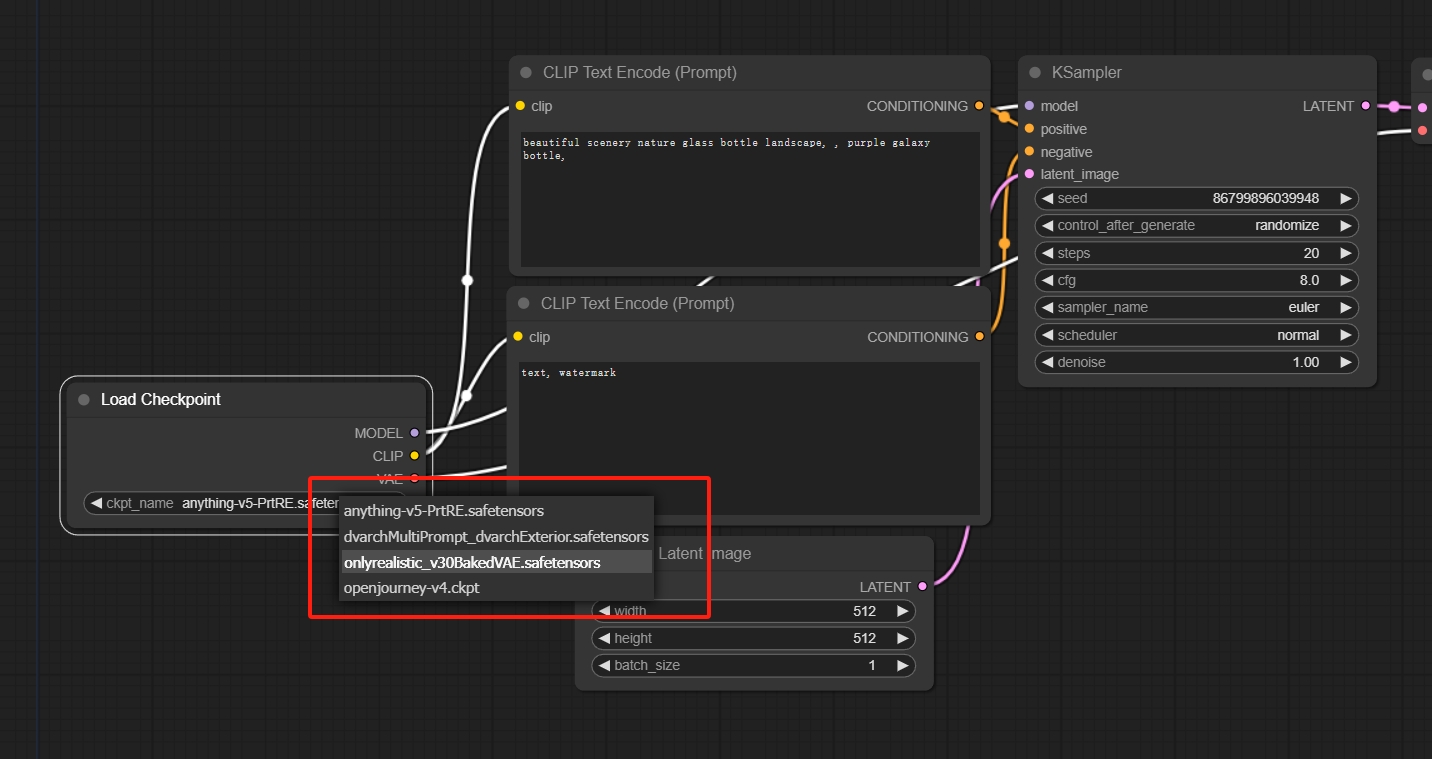
ComfyUI stores models in
ComfyUI_windows_portable_nvidia\ComfyUI_windows_portable\ComfyUI\models\checkpoints
Download your preferred models (refer to our Stable Diffusion Models Overview for recommendations) and place them in the checkpoints folder. Restart the service to see your models in the dropdown menu:
Getting Started
Basic Workflow Setup
- Add your prompt text in the designated fields
- Connect the nodes as shown in the diagram below
- Configure the
Empty latent imagesettings for output size and batch count
Generate Images
Click the Queue Prompt button in the rightmost panel or press Ctrl + Enter
Essential Keyboard Shortcuts
| Shortcut | Function |
|---|---|
| Ctrl + Enter | Queue current workflow |
| Ctrl + Shift + Enter | Queue current workflow as first priority |
| Ctrl + Z/Ctrl + Y | Undo/Redo |
| Ctrl + S | Save workflow |
| Ctrl + O | Load workflow |
| Ctrl + A | Select all nodes |
| Alt + C | Collapse/Expand selected nodes |
| Ctrl + M | Mute/Unmute selected nodes |
| Ctrl + B | Bypass selected nodes |
| Delete/Backspace | Delete selected nodes |
| Ctrl + Backspace | Clear current workflow |
| Space | Hold to pan canvas |
| Ctrl/Shift + Click | Add node to selection |
| Ctrl + C/Ctrl + V | Copy/Paste selected nodes (breaks connections) |
| Ctrl + C/Ctrl + Shift + V | Copy/Paste with maintained connections |
| Shift + Drag | Move multiple selected nodes |
| Ctrl + D | Load default workflow |
| Alt + + | Zoom in |
| Alt + - | Zoom out |
| Ctrl + Shift + Left Click + Vertical Drag | Zoom canvas |
| Q | Toggle queue visibility |
| H | Toggle history visibility |
| R | Refresh workflow |
| Double Left Click | Open quick node search |
More Articles
![OpenAI 12-Day Technical Livestream Highlights Detailed Report [December 2024]](/_astro/openai-12day.C2KzT-7l_1ndTgg.jpg)

